Escape the starting Crypt
Follow the available platforms and doors until you reach the outdoor Graveyard. Treat treasure as optional when the exit timer is running low.
Unlock Graveyard, escape its timed Crypt, collect four Crypt Keys, defeat Big Bob, and find the hidden room that contains Snek.
Quick answer: No. Graveyard does not currently have a separate Tier 2 or Tier 3 option to unlock. Its complete progression is contained in one run: escape the starting Crypt, collect four Crypt Keys in the outdoor Graveyard, enter the second Crypt, then defeat Big Bob.
| If you searched for... | What you actually need | Go to |
|---|---|---|
| Graveyard Tier 2 | There is no separate selectable tier. Complete the full four-key route in the existing Graveyard. | Full route |
| Unlock Graveyard | Complete the Calcium objective on Desert Tier 2 to add Graveyard to map selection. | Unlock steps |
| Beat Graveyard | Reach Big Bob through the second Crypt and defeat him. | Big Bob strategy |
The Graveyard map doesn't simply unlock by playing. It involves one of the longest specific unlocking quest-chains in the game, requiring you to play hide-and-seek with ghosts.
NOTE: You do not need to finish or win the Desert Tier 2 run. The exact millisecond the Undead Boss dies, the Graveyard is permanently added to your map selection screen. Need a build to beat him? View our Undead Boss Strategy Guide.
Quick answer: A Graveyard run starts inside a timed Crypt. Find the exit before the timer ends, collect four keys from guarded coffins outside, return to the marked Crypt Door, clear the second timed Crypt, and go through its final door to fight Big Bob.
Follow the available platforms and doors until you reach the outdoor Graveyard. Treat treasure as optional when the exit timer is running low.
Search the outdoor map for four red-beam coffins. Open each coffin, defeat its guardian, and pick up the Crypt Key.
Look for the red gust of wind that marks the door. Insert all four keys to enter the second Crypt section.
Cross the second timed interior and pass through the last door before the timer expires to begin the boss fight.
When a Crypt timer reaches zero: A short grace window remains before Spooky Steve appears. He is a high-health optional boss rather than an enemy you should expect an early build to defeat. Beating him unlocks Roberto.
Crypt Escape challenges: the timed challenge variants refer to the first Crypt at the start of the run. Use a fast character and treat each attempt as a clean movement run rather than a loot run.
The key coffins are scattered around the outdoor Graveyard rather than kept together inside one building. They are not fixed to one reusable coordinate route.
| What to look for | What happens | Route decision |
|---|---|---|
| Red beam above a coffin | This marks a coffin that contains a Crypt Key. | Move close enough to discover it; the coffin then appears on the map so you can return later. |
| Open Coffin interaction | Summons one of the four guardian ghosts: Jeff, Mike, Ted, or Gary. | Delay the interaction if the current build cannot handle a miniboss safely. |
| Key after the guardian dies | The Crypt Key must be collected from the coffin encounter. | Confirm the pickup before leaving; killing the guardian alone is not the end of the step. |
| Red wind at the Crypt Door | Marks the entrance that accepts the full set of four keys. | Return only after the key set is complete and the build is ready for the second timed Crypt. |
Safe order: scout first, mark coffins, gain levels from ordinary enemies, then return to the guardians. The ghosts become progressively stronger, so opening every coffin immediately can turn a route problem into a damage problem.
After inserting all four Crypt Keys, enter the Crypt Door and follow the second timed route to its final door. Big Bob waits beyond that exit. Defeating him unlocks the Scythe weapon.
Activate the charge shrines before Big Bob begins his lethal attack. Do not wait for the attack animation to start.
Move into an active shrine's area when the lethal attack resolves. The protection is the key mechanic; ordinary damage stacking does not replace it.
Use jumps and movement to cross the arena safely while continuing damage. Avoid spending every movement option before the lava covers your route.
Activated shrines expire. Rotate to another charged shrine instead of assuming the first one will protect every cast.
Most common wipe: entering the arena without charging a shrine, then trying to activate one after the lethal cast begins. Charge first, fight second.

Big Bob is the destination of the four-key Crypt route. Defeat him after clearing the second timed Crypt to add Scythe to the weapon pool.
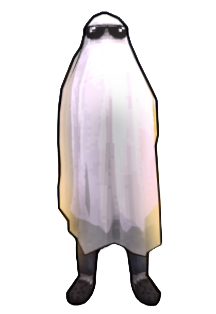
Spooky Steve appears shortly after a Crypt timer reaches zero. His unusually large health pool makes him a deliberate damage test, not a normal route target. Defeat him to unlock Roberto. (Use the Spooky Steve boss strategy).
The Crypt also contains a hidden route to Snek. This is separate from the four-key Big Bob objective, so decide whether the current attempt is a boss clear or a Secret Room search.
Common mistake: jumping into the lava before activating the pressure plate. Find the plate first; otherwise the hidden tunnel is not open.
| Problem | Likely cause | Fix |
|---|---|---|
| Tier 2 is missing | Graveyard has no separate Tier 2/3 selector. | Choose Graveyard and complete its four-key route. |
| A key is missing | A guardian died, but the dropped key was not collected. | Revisit discovered red-beam coffin markers and confirm the pickup. |
| The Crypt Door will not open | The full set of four keys is incomplete. | Check every coffin encounter before returning to the red-wind door. |
| Spooky Steve appeared | The Crypt timer and grace period expired. | Ignore optional loot and take the exit; Steve is not required for the Big Bob route. |
| Big Bob kills you instantly | No active charged shrine protected the lethal cast. | Charge shrines early, stand in an active area for the cast, and keep another ready. |
| The Secret Room is not obvious | The room can be mirrored, so fixed left/right directions fail. | Find two jump pads and the central pillar, then use the lower pressure plate. |
Exploration within the Graveyard rewards observant players with unique artifacts that don't spawn natively in the Forest or Desert.
You cannot select a separate Graveyard Tier 2 or Tier 3 in the current game. Choose Graveyard and complete its built-in Crypt, four-key, and Big Bob route.
A Graveyard run begins inside a timed Crypt. Escape it to reach the outdoor map; later, four Crypt Keys open the marked Crypt Door leading to Big Bob.
Four. Each key comes from a red-beam coffin encounter guarded by Jeff, Mike, Ted, or Gary.
Move close enough to discover it. The coffin is then added to the map, allowing you to level up and return when ready.
Defeating Big Bob unlocks the Scythe weapon. To unlock Bob's Light, make damage from charging a lamp deal the finishing blow. Bob's Light currently has a 33% chance to one-shot Red Ghosts (up from 15% in v1.0.49).
Charge the arena shrines before the cast, then stand inside an active shrine's protected area when the attack resolves. Activated shrines expire, so keep another charged for a later cycle.
In the Crypt, find the room with two jump pads and a central pillar. Activate the pressure plate on its lower platform, then enter the tunnel that opens in the lava wall to collect Snek.
Open every chest and pot in the first Crypt. Any character works; zero on the displayed timer is not an instant failure, but Spooky Steve arrives after a short grace window. See the full Stainless Steel Pot guide for route and build details.
A short grace window begins, then Spooky Steve appears. Defeating this high-health optional boss unlocks Roberto.